How can I add a student?
In this article, we'll cover how to create student accounts as a teacher or manager.
Creating student accounts lets you enroll learners in live lessons and gives them access to asynchronous study materials. Once enrolled, students can review their lessons at any time and complete homework and assessments
If your account is rostered via SSO (Clever or Classlink), manual rostering of Teachers, Students, and Classes is disabled. Please contact your coordinator or IT contact for help with rostering. Learn more in this Help Article.
This article is composed of two sections:
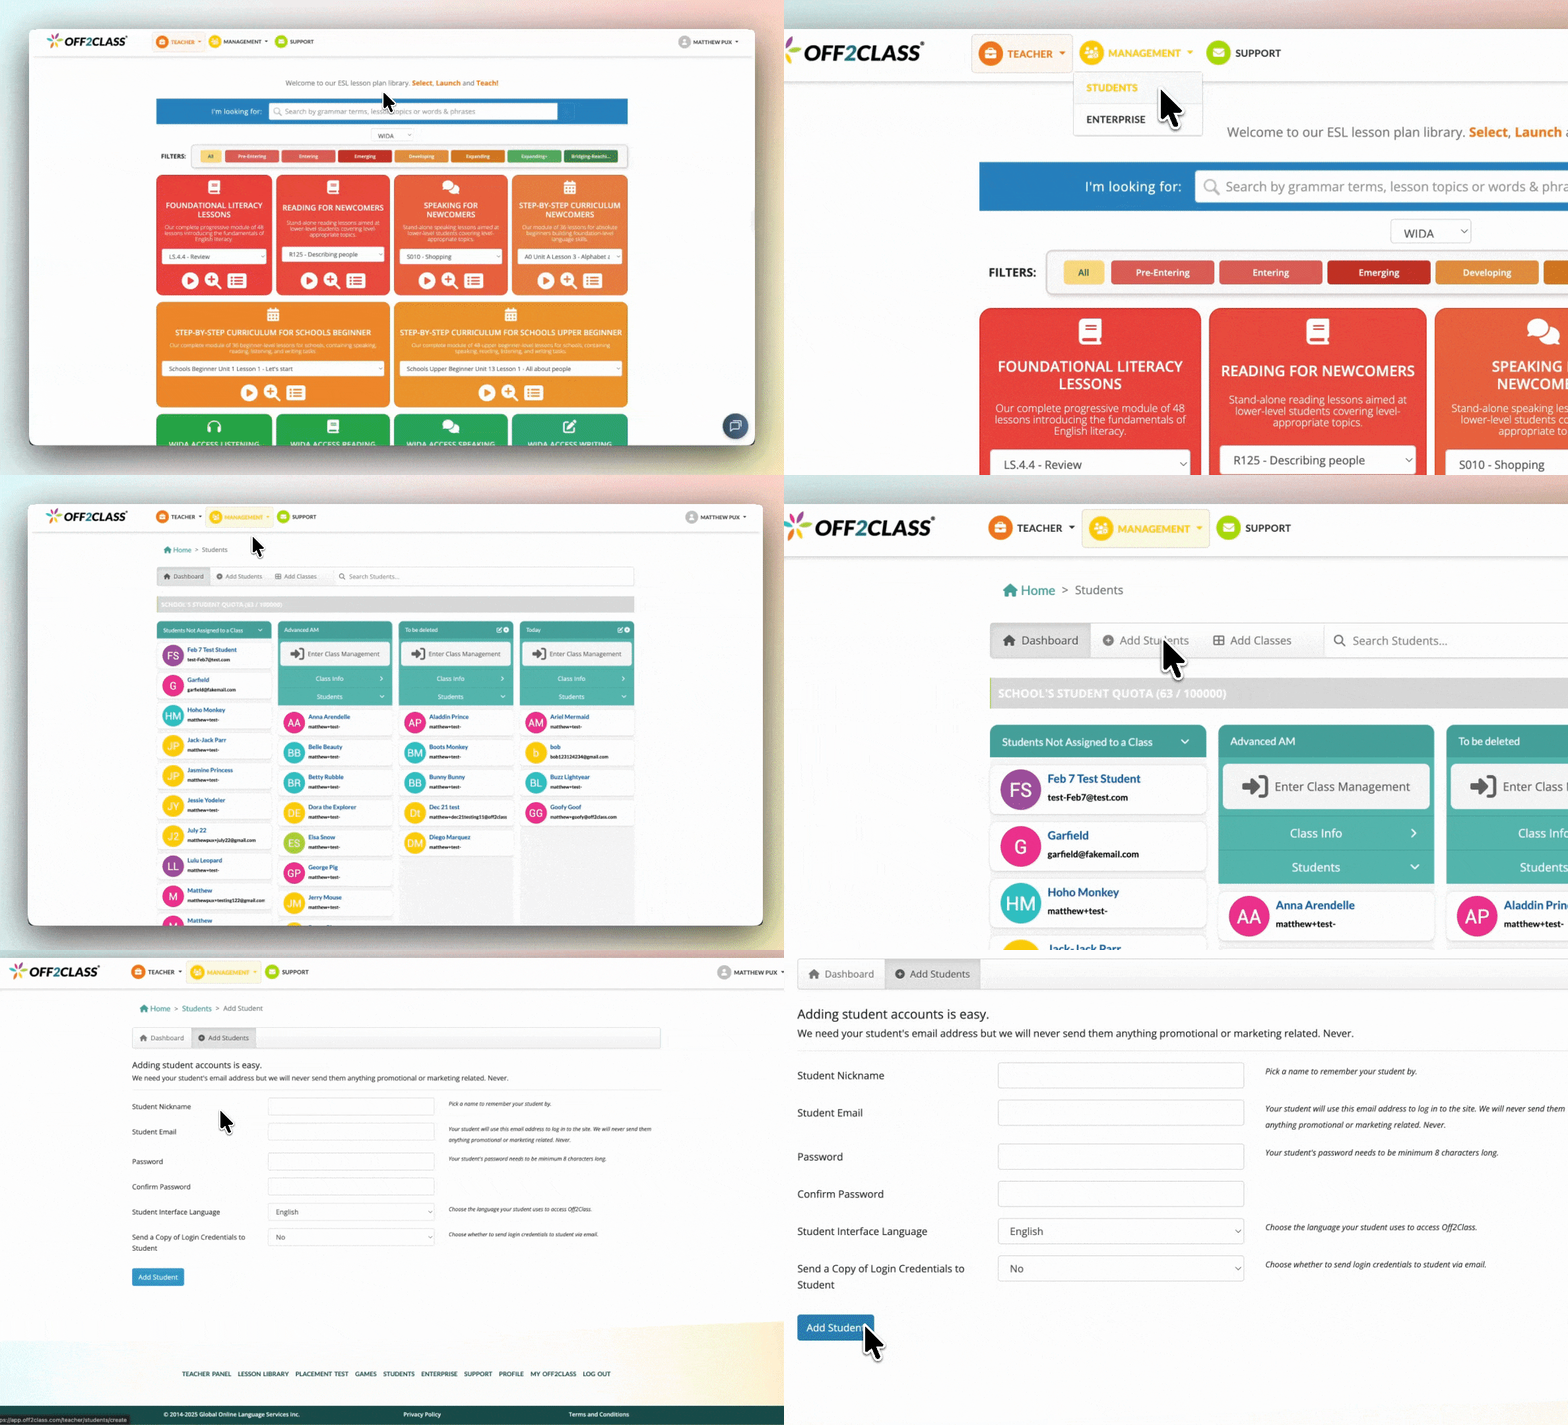
Adding students as a teacher

- Click 'student management' in the top left.
- If you also have the enterprise manager role, hover over management, then click 'students'
- Click 'add students' near the top left.
- Fill out the fields and click 'add student' once complete
- Name: The Student’s full name.
- Email: The Student’s email.
- Password: Used to log in to Off2Class. (Must be at least 8 characters long)
- Student Interface Language: This setting translates the text on the student’s home page to aid in navigation. All lesson content remains in English.
- Send a Copy of the Login Credentials to Student: If toggled to “Yes”, Off2Class will email the student with their login details.
- By default, this is set to "No", in which case you will need to give the username and password to your student.
You can also add a student when sending the placement test for the first time.
If a message appears about transferring or reactivating your student, check out this article.
Adding students as a manager
Adding students as a manager is only available on paid multi-teacher subscriptions.
As an enterprise manager, you can add students from the Enterprise Management Panel one at a time or in bulk.
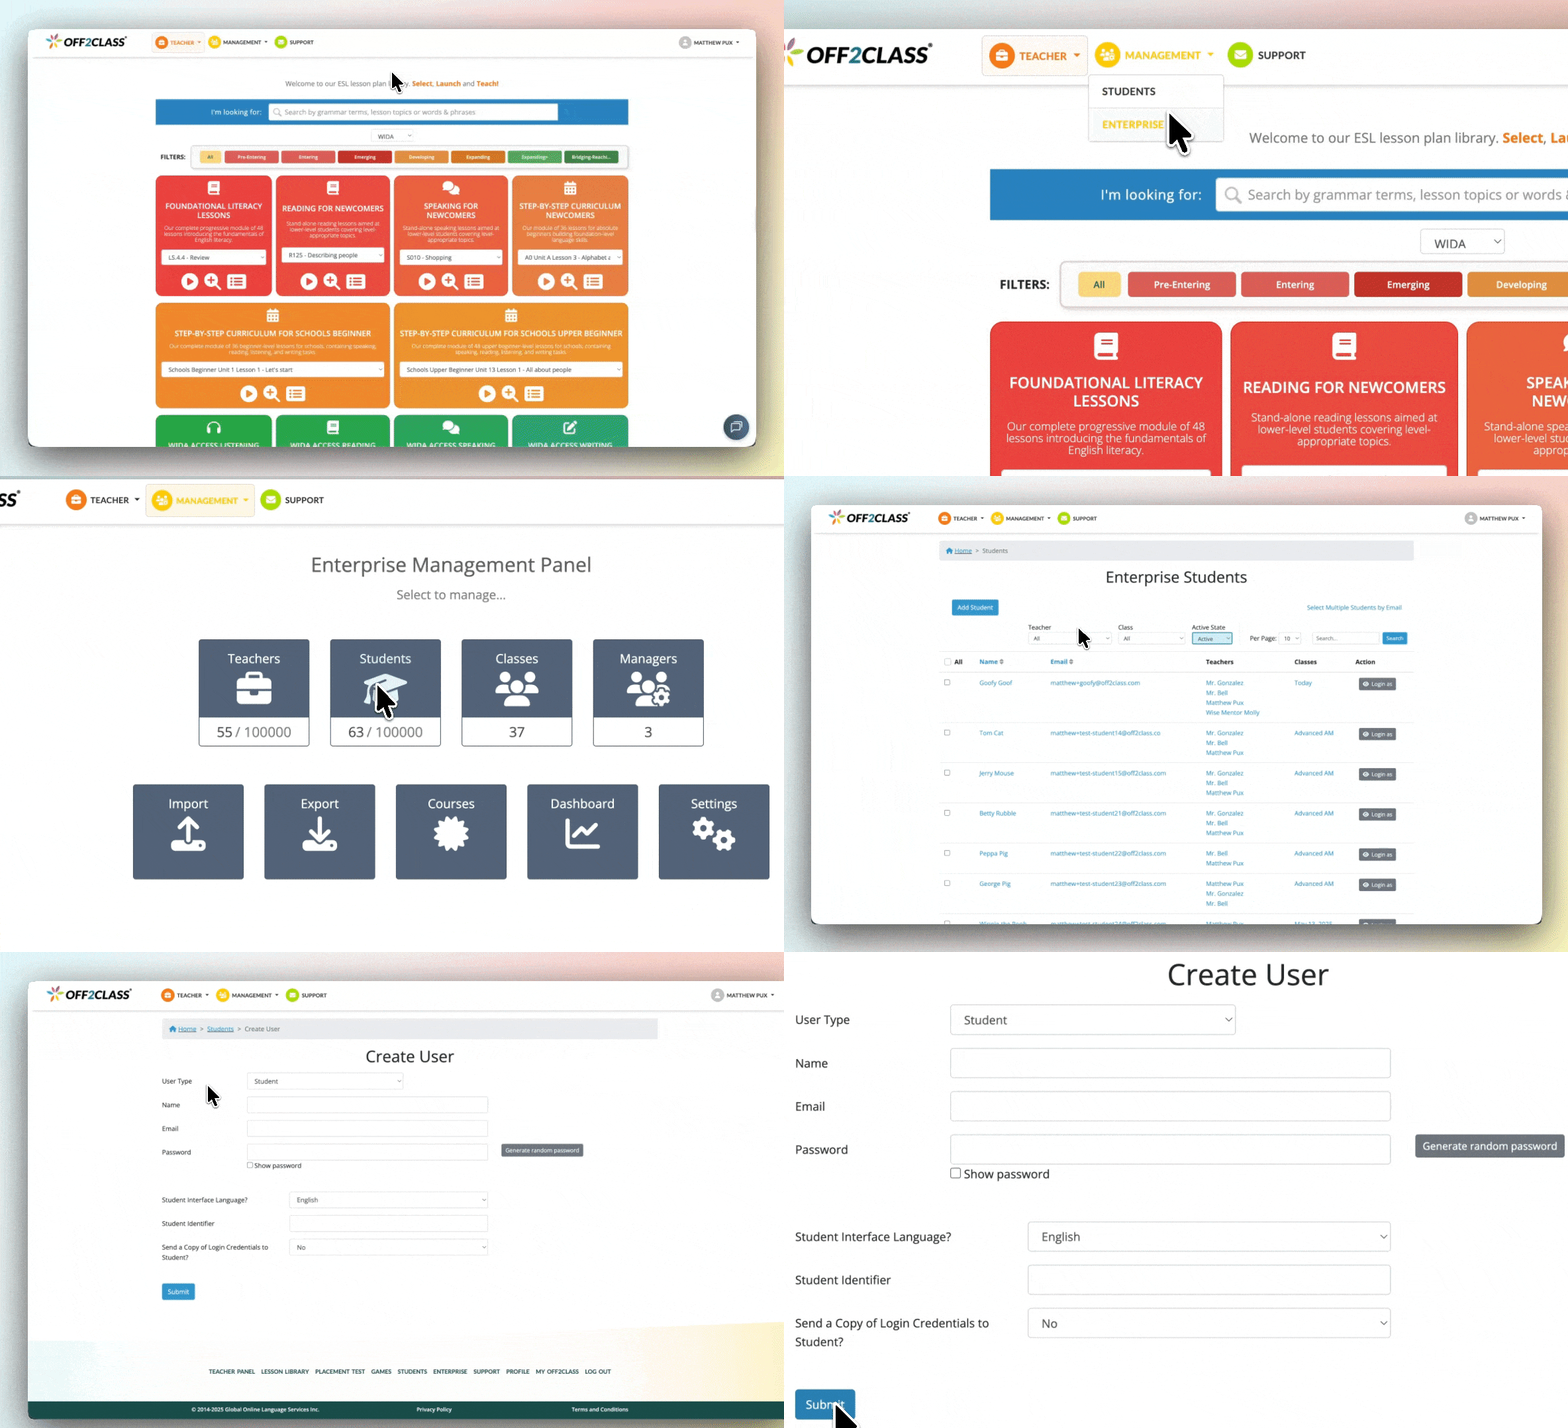
Adding students one at a time

- Click 'management' in the top left.
- If you also have the teacher role, hover over management, then click 'enterprise'
- Click the 'students' card.
- Click 'add student' near the top left
- Fill out the fields and click 'submit' once complete
- Name: The Student’s full name.
- Email: The Student’s email.
- Password: Used to log in to Off2Class. (Must be at least 8 characters long)
- Student Interface Language: This setting translates the text on the student’s home page to aid in navigation. All lesson content remains in English.
- Student Identifier: An optional field designed to easily match student IDs with those in a Student Information System (SIS)
- Send a Copy of the Login Credentials to Student: If toggled to “Yes”, Off2Class will email the student with their login details.
-
-
- By default, this is set to "No", in which case you will need to give the username and password to your student.
-
We’ll send you an email with their login details along with some helpful information.
Adding students in bulk via import

*In this video above, we use Google Sheets, but you can use any method you desire. As long as the template is used, the import format will be correct.
- Click 'management' in the top left.
- If you also have the teacher role, hover over management, then click 'enterprise'
- Click the 'import' card.
- Click 'go to import students' on the right.
- Download the template.
- The template will give you a spreadsheet file with a .CSV (comma-separated values) that is pre-formatted exactly how it needs to be in order to bulk-add students to Off2Class.
- Open the file and fill out the template
- Important
- Ensure you keep all header information in the file, even if the rows do not contain information. Uploading a file without all the header information can result in an import failure.
- Ensure that each row has a unique email address.
- To assign multiple teachers to a student, first create a class in Off2Class and then assign all of the teachers to that class. Then, add that class to the 'Student Class Name' column.
- Trailing characters/spaces/new lines sometimes cause the importer to throw an error. Ensure the CSV file is formatted correctly.
- Required fields
- Student Email: The student’s email
- Student Username: The student’s full name
- Student Password: Used to log in to Off2Class. (Must be at least 8 characters long)
- Teacher Email: The email of the teacher you want to assign to the student
- Optional fields
- Student Class Name: Name of the class you want to assign the student to
- Existing class: If a class with the exact same name exists, the student will be added to that class.
- New class: If the class does not exist, one will be created when the file is uploaded.
- Student Identifier: Designed to easily match student IDs with those in a Student Information System (SIS). Up to 25 characters.
- Student Class Name: Name of the class you want to assign the student to
- Important
- Back in Off2Class, choose the file you just created and click 'upload'
- The importer will only upload new students. Students already on your account will be ignored if they appear in the file.
- Students do not receive automated emails once their account is created via import.
If a student exists on your enterprise, exists on another enterprise or is deactivated a message will appear. Learn more in this help article.
- Yellow highlight: The student(s) are already active and part of your enterprise. In this scenario, the students highlighted in yellow will be ignored.
- Blue highlight: The student(s) are already registered on this site. You have two options:
- Update your CSV file and use an alternative email address for the student, OR
- Send a transfer request to the student via in-app notification and email.
