The features mentioned in this article are only available to Managers on paid subscriptions.
Related articles:
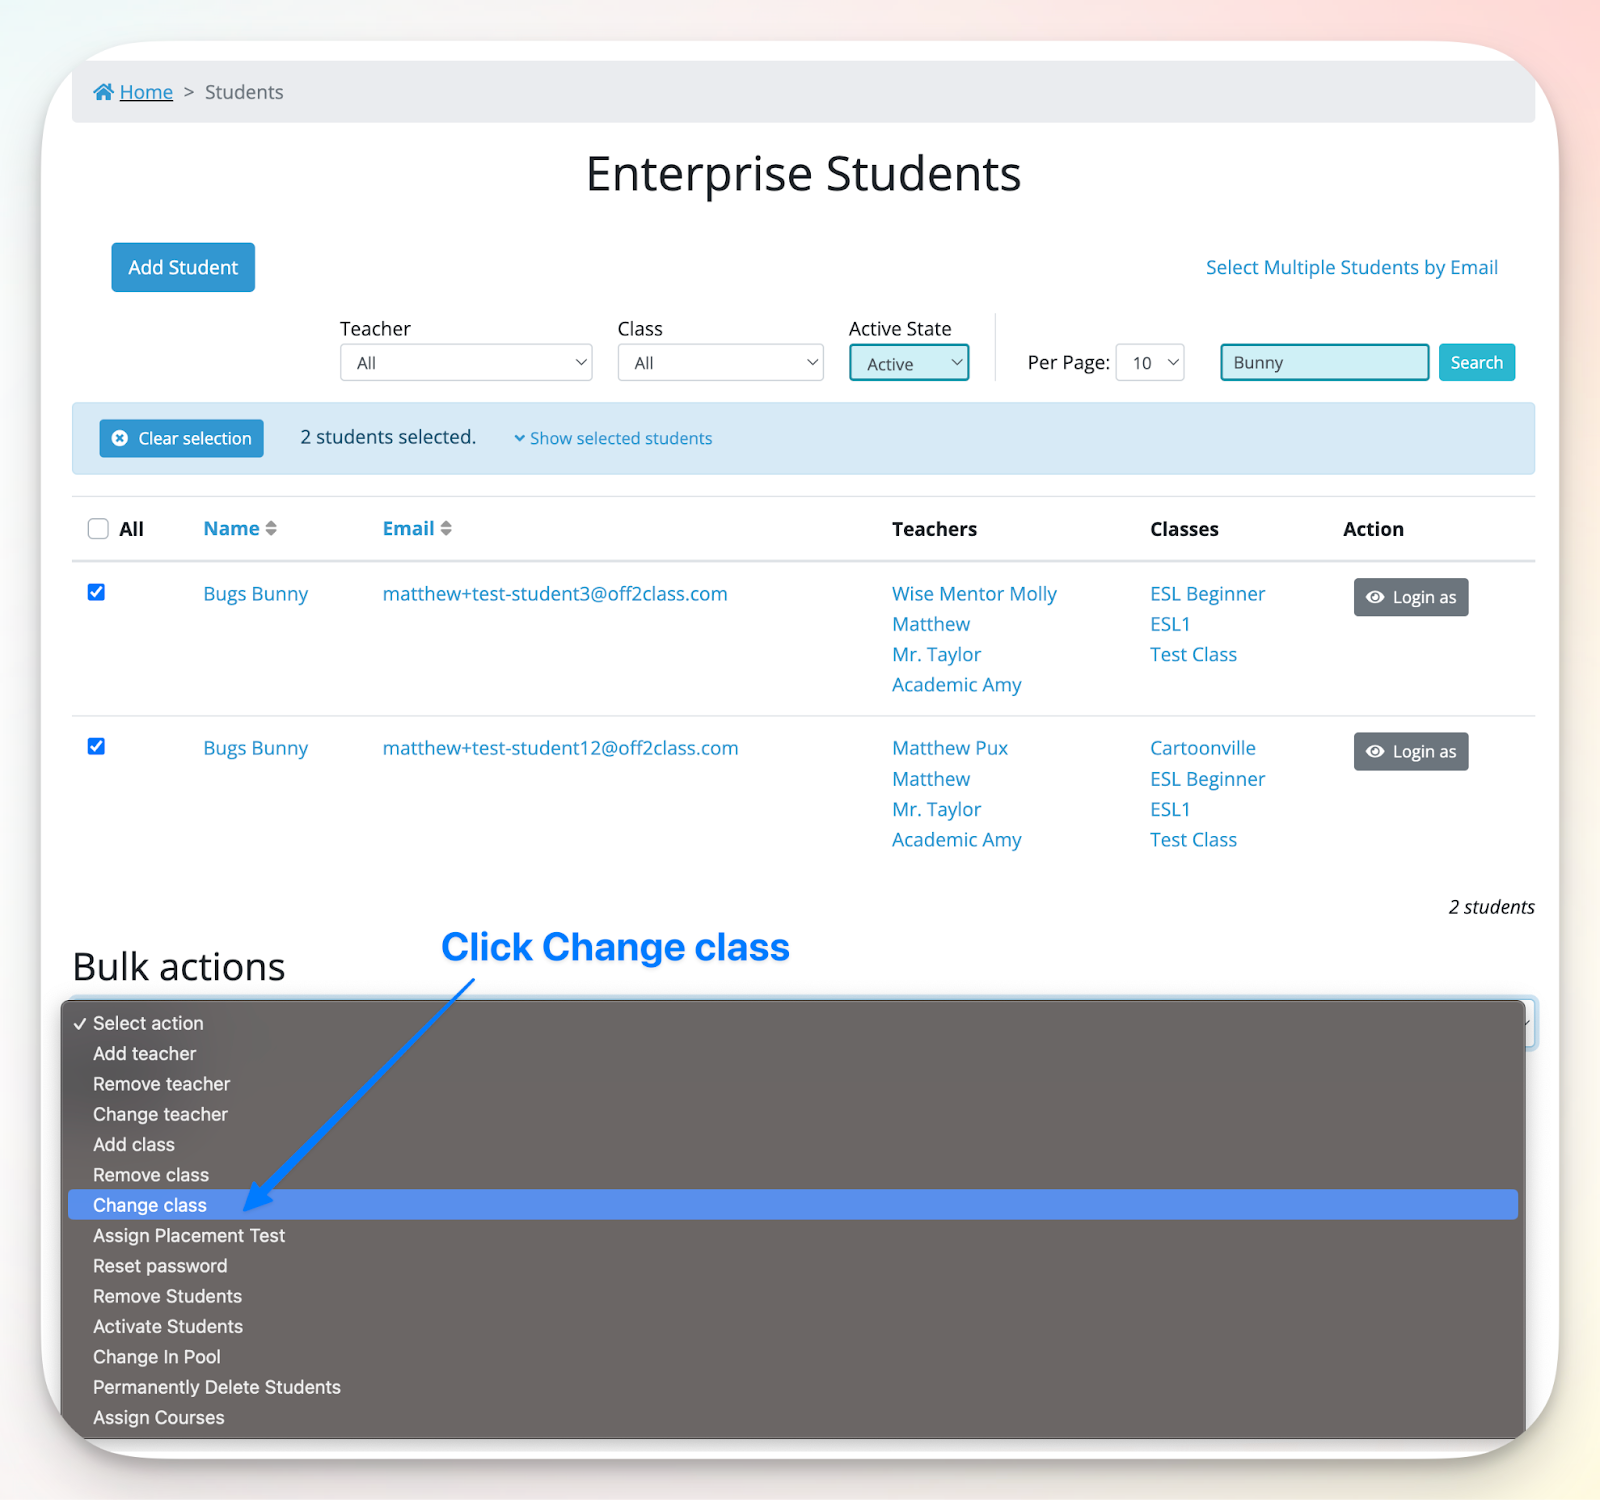
To change the class the student is assigned to, start in the Enterprise Management Panel. Click Student, then select one or multiple students by clicking on the box to the left of the student's name.
If your account is rostered via SSO (Clever or Classlink), manual rostering of Teachers, Students, and Classes is disabled. Please contact your coordinator or IT contact for help with rostering. Learn more in this Help Article.

Click Change class in the Bulk actions menu and then Submit.
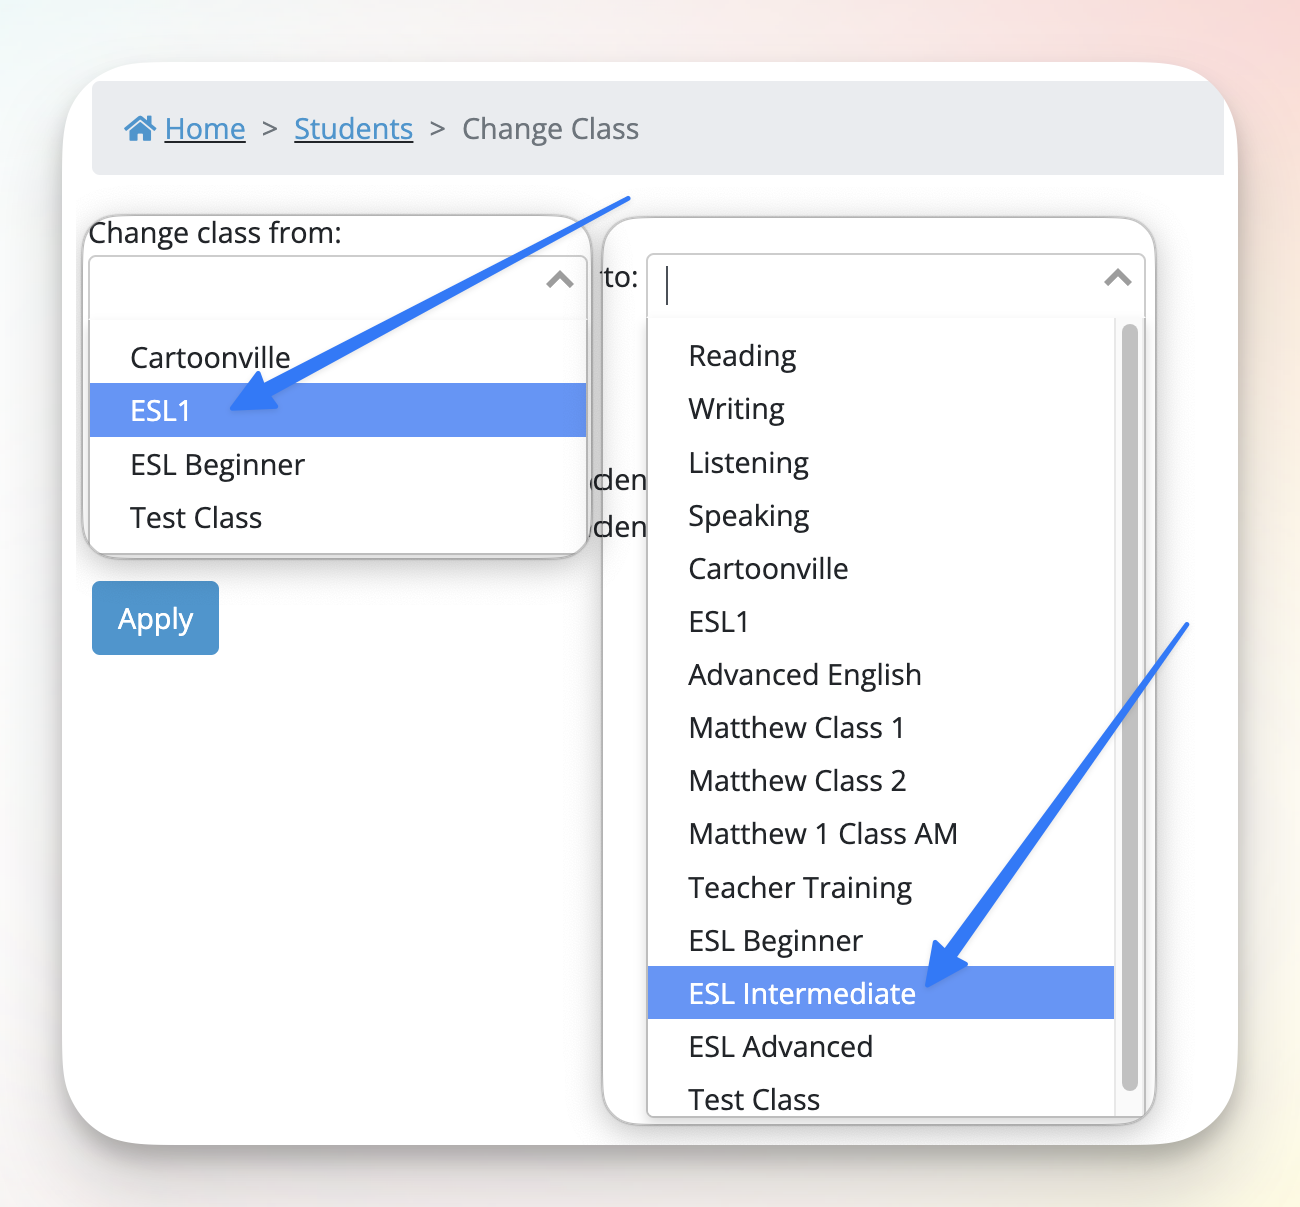
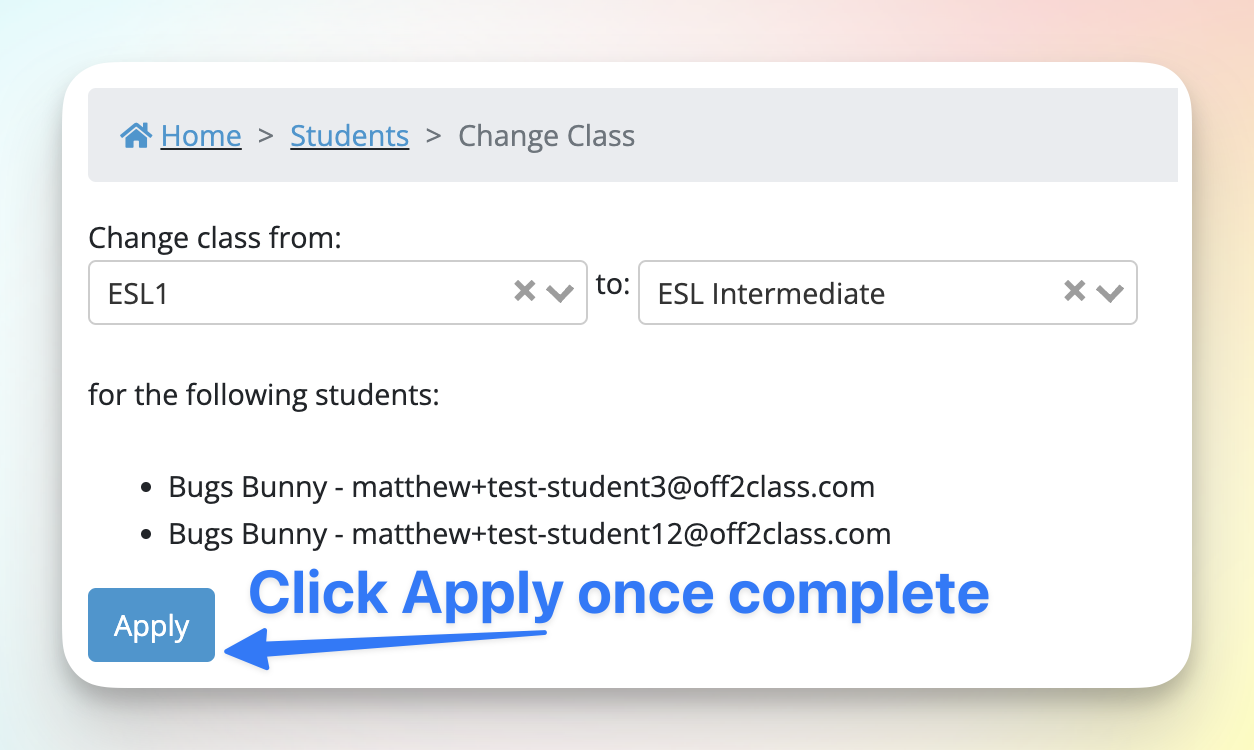
The Change class action should be used in order to replace an existing class of a student (or multiple students) with another class.
- If you are simply looking to add or remove a class, you should use Add Class or Remove Class actions.
Important: ensure that the teacher(s) who currently manage the class are also added to the student(s), or the teacher(s) may experience error messages. Learn how to add a teacher to a student here. If you have yet to add teacher(s) to the class, you can learn how to do that here.